
Welcome to the Honeywell 5000 installation manual, your comprehensive guide for installing and configuring the FocusPRO 5000 Series thermostat․ Designed for compatibility with various HVAC systems, including heat, cool, and heat pump configurations, this manual provides step-by-step instructions to ensure a seamless setup․ Whether you’re using battery power or hardwiring, the thermostat offers flexibility and ease of use․ With features like filter change reminders and low battery indicators, the Honeywell 5000 is built to simplify home climate control․ Follow this manual for a trouble-free installation and optimal performance․

System Requirements and Compatibility
The Honeywell 5000 thermostat is compatible with 24V HVAC systems, including heat, cool, and heat pump configurations․ It supports both conventional and heat pump wiring setups, ensuring versatility․ The thermostat can be powered by two AA alkaline batteries or hardwired to a 24V AC power source, offering installation flexibility․ It is designed to integrate seamlessly with various HVAC systems, providing reliable performance and compatibility with standard home setups․
2․1․ Compatible HVAC Systems (Heat, Cool, Heat Pump)
The Honeywell 5000 thermostat is designed to work with various HVAC systems, including gas, oil, and electric heating systems, as well as conventional cooling systems․ It is also compatible with heat pump configurations, providing efficient temperature control for both heating and cooling modes․ The thermostat supports 1 Heat/1 Cool systems, making it versatile for different home setups․ Its compatibility ensures reliable performance across a wide range of HVAC configurations․
2․2․ Power Supply Options (Battery vs․ Hardwired)
The Honeywell 5000 thermostat offers flexible power options, supporting both battery and hardwired installations․ It can be powered by two AA alkaline batteries, providing wireless convenience, or connected to a 24V AC power source for a hardwired setup․ This dual-power capability ensures easy installation and reliable operation, catering to different household preferences and electrical configurations․

Pre-Installation Steps
Before installing the Honeywell 5000, ensure power to the HVAC system is off․ Remove the existing thermostat and prepare the wallplate․ Verify system compatibility and gather necessary tools for a smooth installation process․
3;1․ Removing the Old Thermostat
Switch off the HVAC system at the circuit breaker or fuse box․ Verify the system is off by checking airflow or temperatures․ Carefully pull the old thermostat away from the wall to access the wiring․ Disconnect the wires from the existing thermostat, taking note of their colors and connections for reference․ Remove any screws or clips securing the old thermostat to the wall․ Set the old thermostat aside and prepare the area for the new installation․
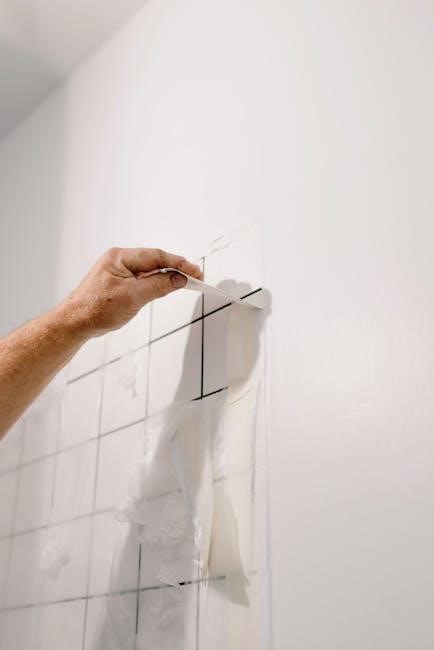
3․2․ Preparing the Wallplate
Detach the wallplate from the thermostat by gently pulling it away․ Remove the battery holder to access the wiring area․ Carefully pull the wires through the wire hole in the wallplate to ensure proper connections․ Position the wallplate on the wall, ensuring it is level, and mark the screw holes with a pencil․ This step ensures a secure and even installation surface for the new Honeywell 5000 thermostat․
Wiring and Connections
Connect the wires according to the system type, ensuring proper terminals for heating, cooling, and power․ Use 18-22 gauge thermostat wire for reliable connections․
4․1․ Conventional System Wiring
For conventional HVAC systems, connect the R (24V) wire to the wallplate’s R terminal․ The W and Y wires link to heating and cooling respectively․ Ensure G is connected for fan operation․ Use 18-22 gauge wires and verify all connections match your system’s configuration․ Secure wires tightly to avoid loose connections, which can cause malfunctions․ This setup ensures proper operation of heating, cooling, and fan functions․
4․2․ Heat Pump System Wiring
For heat pump systems, connect the R (24V) wire to the wallplate’s R terminal․ The W and Y wires connect to the heating and cooling stages, respectively․ The O or B wire is essential for heat pump operation․ Secure all wires tightly and ensure connections match your system’s configuration․ Refer to your HVAC system’s manual for specific wiring requirements․ Proper connections are crucial for accurate operation and to avoid system malfunctions;
Mounting the Wallplate
Remove the battery holder and wallplate from the thermostat․ Pull wires through the wire hole, position the wallplate on the wall, and ensure it is level․ Mark the wall for drilling, then secure the wallplate using provided screws․ Tighten firmly to ensure stability and proper alignment for accurate thermostat operation․
5․1․ Leveling and Marking the Wall
Begin by ensuring the wallplate is level using a spirit level․ Hold the wallplate against the wall and adjust until the bubble aligns in the center․ Once leveled, use a pencil to mark the screw holes․ Gently press the wallplate to transfer the marks․ Remove the wallplate and double-check the alignment․ Secure the wallplate firmly to ensure proper installation and accurate thermostat performance․
5․2․ Securing the Wallplate
Remove the battery holder to access the wire hole․ Align the wallplate with the previously marked screw holes․ Insert the screws through the holes and tighten them firmly to secure the wallplate․ Ensure the screws are snug but avoid overtightening, which could damage the wall or wallplate․ Once secured, tuck the wires neatly into the hole to maintain a clean installation․ This step ensures stability for the thermostat’s proper function․

Thermostat Installer Setup
Configure the thermostat to match your HVAC system type and customize features like temperature range and compressor protection․ Proper setup ensures optimal performance and system compatibility․
6․1․ Configuring System Type
Press the SYSTEM button to select the appropriate system type․ Choices include Heat, Cool, or Heat Pump․ Ensure the selection matches your HVAC system for proper operation․ For heat pumps, additional settings like auxiliary heat may be required․ Correct configuration prevents issues like compressor damage and ensures efficient performance․ Follow on-screen prompts to confirm your selection and proceed to other setup options, such as temperature calibration, for a fully customized system․
6․2․ Setting Temperature Calibration
Calibrate the thermostat for accurate temperature display․ Use the MENU button to access settings, then navigate to temperature calibration․ Adjust the offset up to ±3°F to match your room’s actual temperature․ Save the setting to ensure precise heating and cooling performance․ Proper calibration ensures the system operates efficiently, maintaining your desired comfort levels accurately․
Operating Modes
The Honeywell 5000 thermostat features Heat, Cool, Auto, and Off modes for flexible HVAC control․ Auto mode switches between heating and cooling based on indoor temperature, ensuring optimal comfort․
7․1․ Heat Mode
In Heat Mode, the Honeywell 5000 thermostat activates the heating system to maintain the set temperature․ It ensures consistent warmth by regulating the HVAC system’s operation․ The thermostat displays the current temperature and the target heat setting, providing clear feedback․ Users can adjust the temperature using the up/down arrows․ A heat indicator icon appears on the display when the system is actively heating․ This mode prioritizes comfort and efficiency, allowing precise control over your home’s heating needs․
7․2․ Cool Mode
In Cool Mode, the Honeywell 5000 thermostat engages the cooling system to maintain the desired temperature․ The display shows both the current room temperature and the set cooling temperature․ Users can adjust the target temperature using the up/down arrows․ A cool indicator icon appears when the system is actively cooling․ This mode ensures your home stays comfortable during warmer periods, with precise temperature control and energy efficiency․ The thermostat also includes built-in compressor protection for system longevity․
7․3․ Auto Mode
Auto Mode allows the Honeywell 5000 thermostat to automatically switch between heating and cooling to maintain the set temperature․ The system selects the appropriate mode based on the indoor temperature, ensuring optimal comfort․ This feature is ideal for users who want a hands-off approach to climate control․ It minimizes manual adjustments and provides energy-efficient operation․ The thermostat seamlessly transitions between heating and cooling, optimizing performance and reducing the need for constant user input․
7․4․ Off Mode
Off Mode deactivates both the heating and cooling systems, providing an energy-saving option when neither is required․ This mode is ideal for periods when the desired temperature is already achieved or when the system is not needed․ The thermostat ensures no energy is consumed by the HVAC systems, helping to conserve energy․ The fan can still be manually activated if needed, but the heating and cooling functions remain inactive until another mode is selected․
Advanced Features
The Honeywell 5000 offers advanced features like a filter change reminder and low battery indicator, ensuring optimal system performance and maintenance․ These features enhance convenience and efficiency, providing alerts for necessary upkeep and battery replacements, while maintaining precise temperature control and energy savings․
8․1․ Filter Change Reminder
The Honeywell 5000 includes a programmable filter change reminder, alerting you when the HVAC system’s air filter needs replacement․ This feature helps maintain system efficiency and indoor air quality by reminding you to replace the filter every 1-3 months, depending on usage and conditions․ The reminder can be customized to suit your specific needs, ensuring optimal performance and preventing reduced airflow or potential system damage․ Turn off the reminder once the filter is replaced for continued accuracy․
8․2․ Low Battery Indicator
The Honeywell 5000 thermostat includes a low battery indicator, ensuring you’re notified when the AA alkaline batteries need replacement․ This prevents system shutdown and maintains your settings․ The indicator alerts you with a visual cue, allowing you to replace the batteries promptly․ For hardwired systems, this feature isn’t applicable․ Always use the recommended battery type for optimal performance․

Troubleshooting Common Issues
This section provides guidance for resolving common issues with the Honeywell 5000 thermostat, such as temperature display accuracy and system operation problems, ensuring optimal functionality․
9․1․ Temperature Display Accuracy
If the Honeywell 5000 thermostat displays incorrect temperatures, ensure proper calibration․ Adjust the temperature offset in the settings menu to match your room’s actual temperature․ Calibration allows fine-tuning the display by up to 3°F for accuracy․ Check for loose wires or incorrect system type configurations, as these can affect temperature readings․ Refer to the installer setup section for detailed calibration instructions to ensure precise climate control and optimal performance․
9․2․ System Operation Problems
If the system fails to heat or cool, ensure the thermostat is set correctly and the system type matches your HVAC setup․ Check for loose wiring connections and verify that the power supply is stable․ If issues persist, reset the thermostat by removing the batteries or disconnecting power for 30 seconds․ Consult the troubleshooting guide for specific error codes or unusual behavior to restore proper functionality and resolve operational issues effectively․
Maintenance and Care
Regularly clean the thermostat’s display and casing to ensure optimal performance․ Check battery levels and replace them as needed to prevent system interruptions and maintain functionality․
10․1․ Battery Replacement
To replace the batteries in your Honeywell 5000 thermostat, first remove the battery holder located on the back of the device․ Insert two new AA alkaline batteries, ensuring the polarity matches the indicated diagram․ Reattach the battery holder securely to avoid power interruptions․ For disposal, recycle the old batteries responsibly․ This process ensures continuous operation and prevents system shutdowns․ The thermostat also features a low battery indicator to remind you when replacement is needed․
10․2․ Cleaning the Thermostat
Regularly cleaning your Honeywell 5000 thermostat ensures optimal performance and accuracy․ Power off the device before cleaning to prevent damage․ Use a soft, dry cloth to gently wipe the display screen and exterior surfaces․ Avoid using liquids or harsh chemicals, as they may damage the thermostat․ For vents or internal components, use compressed air carefully to remove dust buildup․ Clean the device every 6 months to maintain functionality and ensure precise temperature readings․
Thank you for following the Honeywell 5000 Install Manual․ This guide has provided step-by-step instructions to ensure a smooth installation and optimal performance of your thermostat․ With its user-friendly design and advanced features, the Honeywell 5000 is designed to enhance your home comfort․ Regular maintenance, such as cleaning and battery checks, will keep your system running efficiently․ For further assistance, refer to the user manual or contact Honeywell customer support․ Enjoy the convenience and reliability of your new thermostat!

Additional Resources
Visit yourhome․honeywell․com for manuals and guides․ Contact Honeywell Customer Support at 1-800-468-1502 for assistance․ These resources provide comprehensive support for your Honeywell 5000 thermostat․
12․1․ Honeywell Customer Support Contact
For assistance with your Honeywell 5000 thermostat, contact Honeywell Customer Support at 1-800-468-1502․ Visit yourhome․honeywell․com for additional resources, manuals, and troubleshooting guides․ Their team is available to address installation, operation, or maintenance queries, ensuring your system runs efficiently․ Reach out for professional help with any issues or questions about your Honeywell 5000 thermostat․
12․2․ Online Manuals and Guides
Access digital resources for the Honeywell 5000 thermostat by visiting yourhome․honeywell․com․ This platform offers downloadable PDF manuals, installation guides, and troubleshooting tips․ Specifically, the FocusPRO 5000 Series manual provides detailed instructions for wiring, system configuration, and advanced features․ Visit the site to explore user-friendly guides tailored to your thermostat model, ensuring successful installation and operation․